Load Balancer - AWS

I am a DevOps Engineer from Infosys.
The best way to explain this service is by taking a real-time scenario - let's think of an E-commerce website running on a web server that is hosted in the AWS cloud. The web server is configured in such a way that it can handle a certain amount of incoming web traffic coming from the user's end, but there will be a certain amount of resources provided to that web server like 8 GB of RAM, 4 CPU cores, 300 GB SSD, etc. But on a busy day when huge amount users are trying to access the e-commerce website that will increase the incoming web traffic and the load on that web server will increase tremendously this will crash the web server and the users cannot able to access the website as the web-server is not going to respond on users request.
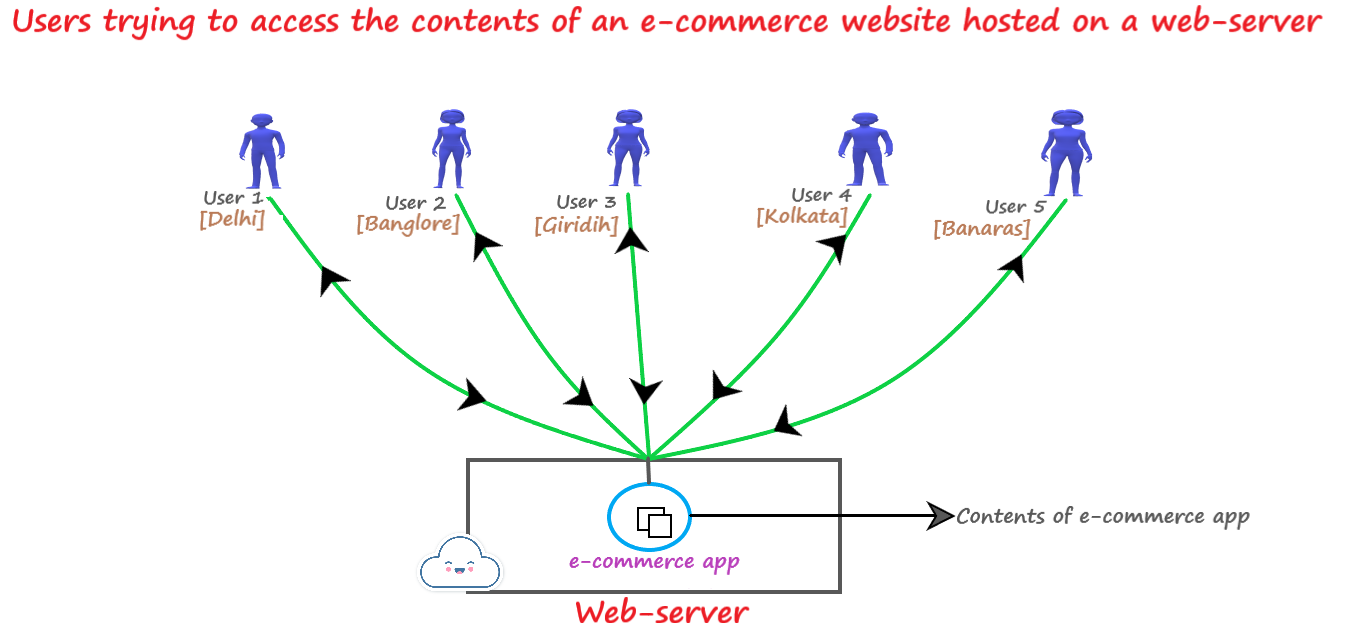
Above is the picture showing the scenario that I am trying to explain. So, how to resolve this critical issue as it causes huge losses in terms of cost, and the company's reputation in the market. Here Load Balancer comes into the picture !!!
What is a Load Balancer ?
A Load Balancer is a cloud service that distributes the incoming web traffic to several web servers so that the load can be distributed on all web servers and each server can work seamlessly, always up & responsive to users.

The above picture is explaining the concept of how a load balancer can help with this. The incoming request is coming from the user's end and it is taken up by a load balancer first which distributes the load among these 2 web servers alternatively. The first request load balancer redirects to web-server-01 & the second request from a different user redirects to web-server-02. In this way, the web traffic is distributed and the users can access the website anytime. One thing is important to note is that the contents of the website are stored on each server are exactly the same.
Benefits of using a Load Balancer:-
A Load Balancer distributes the load(web traffic) among all web servers.
It will check the health of web servers. If all health check fails for any web server then the load balancer will stop sending the web traffic to that particular web server until that server becomes healthy.
How to create a Load Balancer setup:-
Create more than one web server, let's create 2 web servers ( I am using AWS Cloud provider).
Create a load balancer.
Attach the 2 web servers to this load balancer.
Steps to create a Load Balancer:-

Go to the EC2 section & click on Load Balancers.

Click on Create Classic Load Balancer.
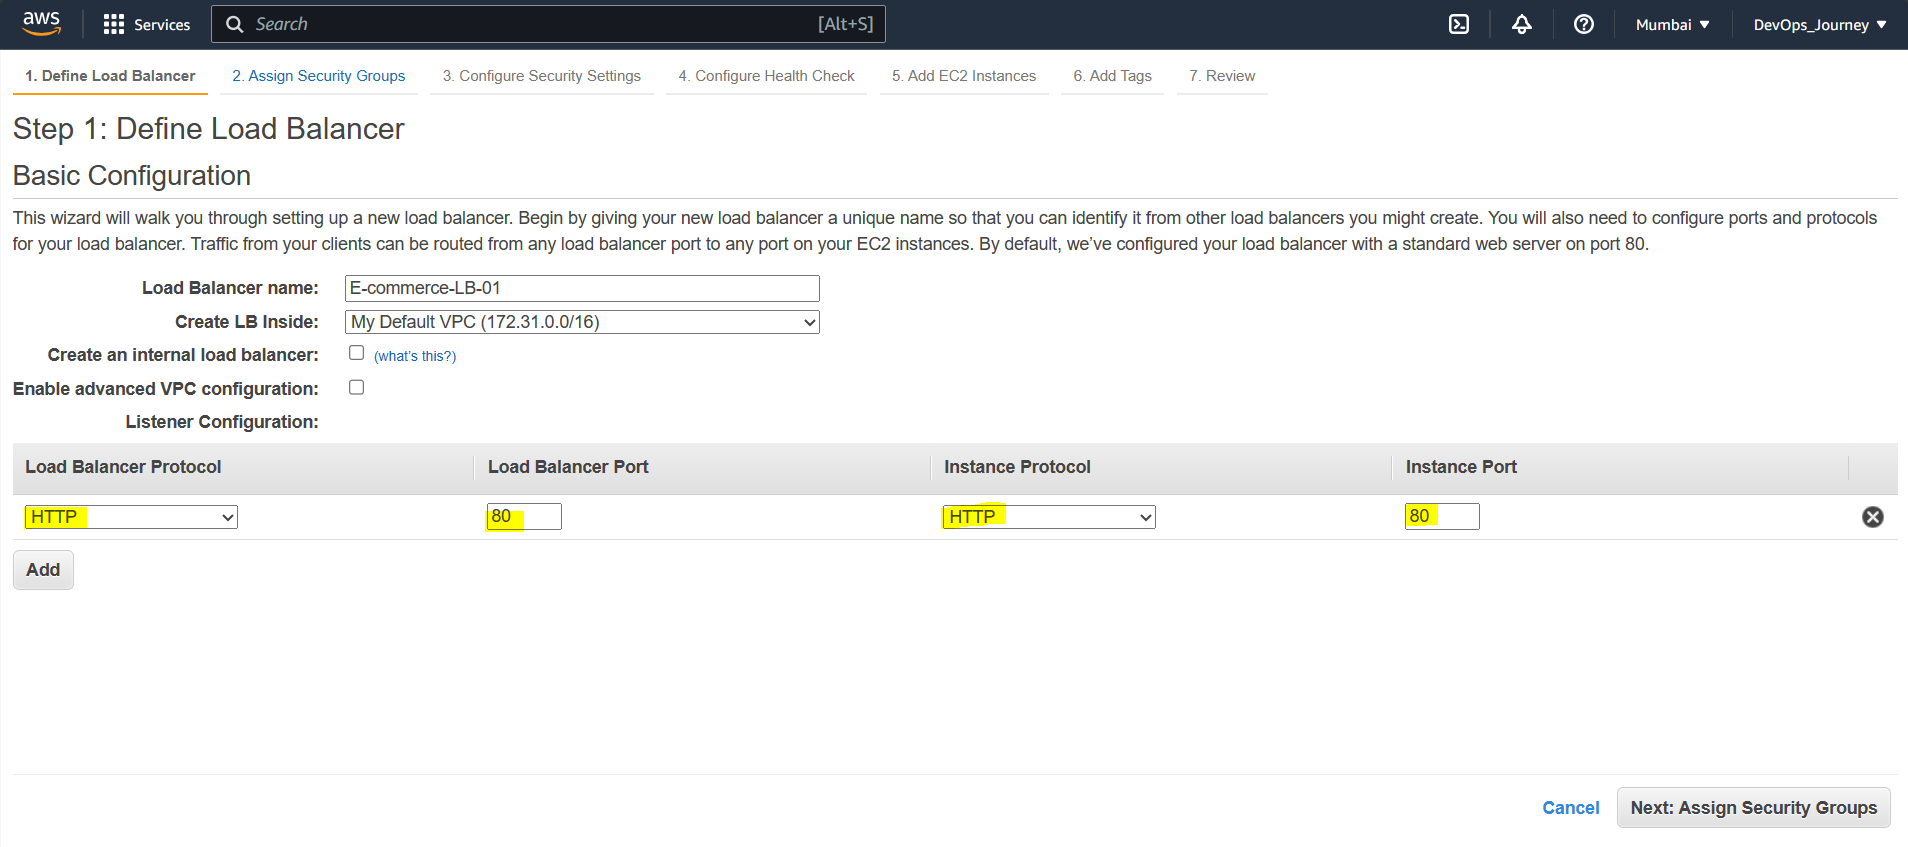
Give a name to Load Balancer and select a secure protocol for the load balancer & instance protocol (web servers).

Create a new security group in which both SSH and HTTP ports are available so that a user can access the web content from the internet(source-custom,range-0.0.0.0/0) & admin can access the web servers via ssh(source-myip, range-give the IP address of admin's machine).

Skip this step.

This step will help to check the health of the web servers by pinging them at regular intervals of time.
Ping protocol = HTTP is used to ping the web servers by HTTP protocol mode.
Ping Port = 80 is used to ping the web servers through its port number 80.
Ping Path = /index.html is the file path that must be present inside each web-servers and the load balancer will only check whether this file is present or not. If the web server is unavailable then this file will also not be accessible by the load balancer, hence load balancer declares this server as unhealthy and does not send any web traffic to this web server.
Response Timeout = 5 seconds, The time period between incoming & outgoing pinging requests between the load balancer and web servers. or the time for which the load balancer waits for the web server's response.
Interval = 30 seconds, The time interval for which the load balancer takes a break and sends response timeout again. It is a repetitive process.
Unhealthy threshold = 2, The number of times for which the load balancer checks whether the web server is sending a response.
1 Interval ---> No response
2 Interval ---> No response
then load balancer concludes the web server is down.
Healthy threshold = 10, If after troubleshooting the web server is working fine, the load balancer will check whether it is working, running, and up. the load balancer sends a request to the web server 10 times here, if, in all 10 requests, the web server responds back then only the load balancer approves that the web server is up and running.
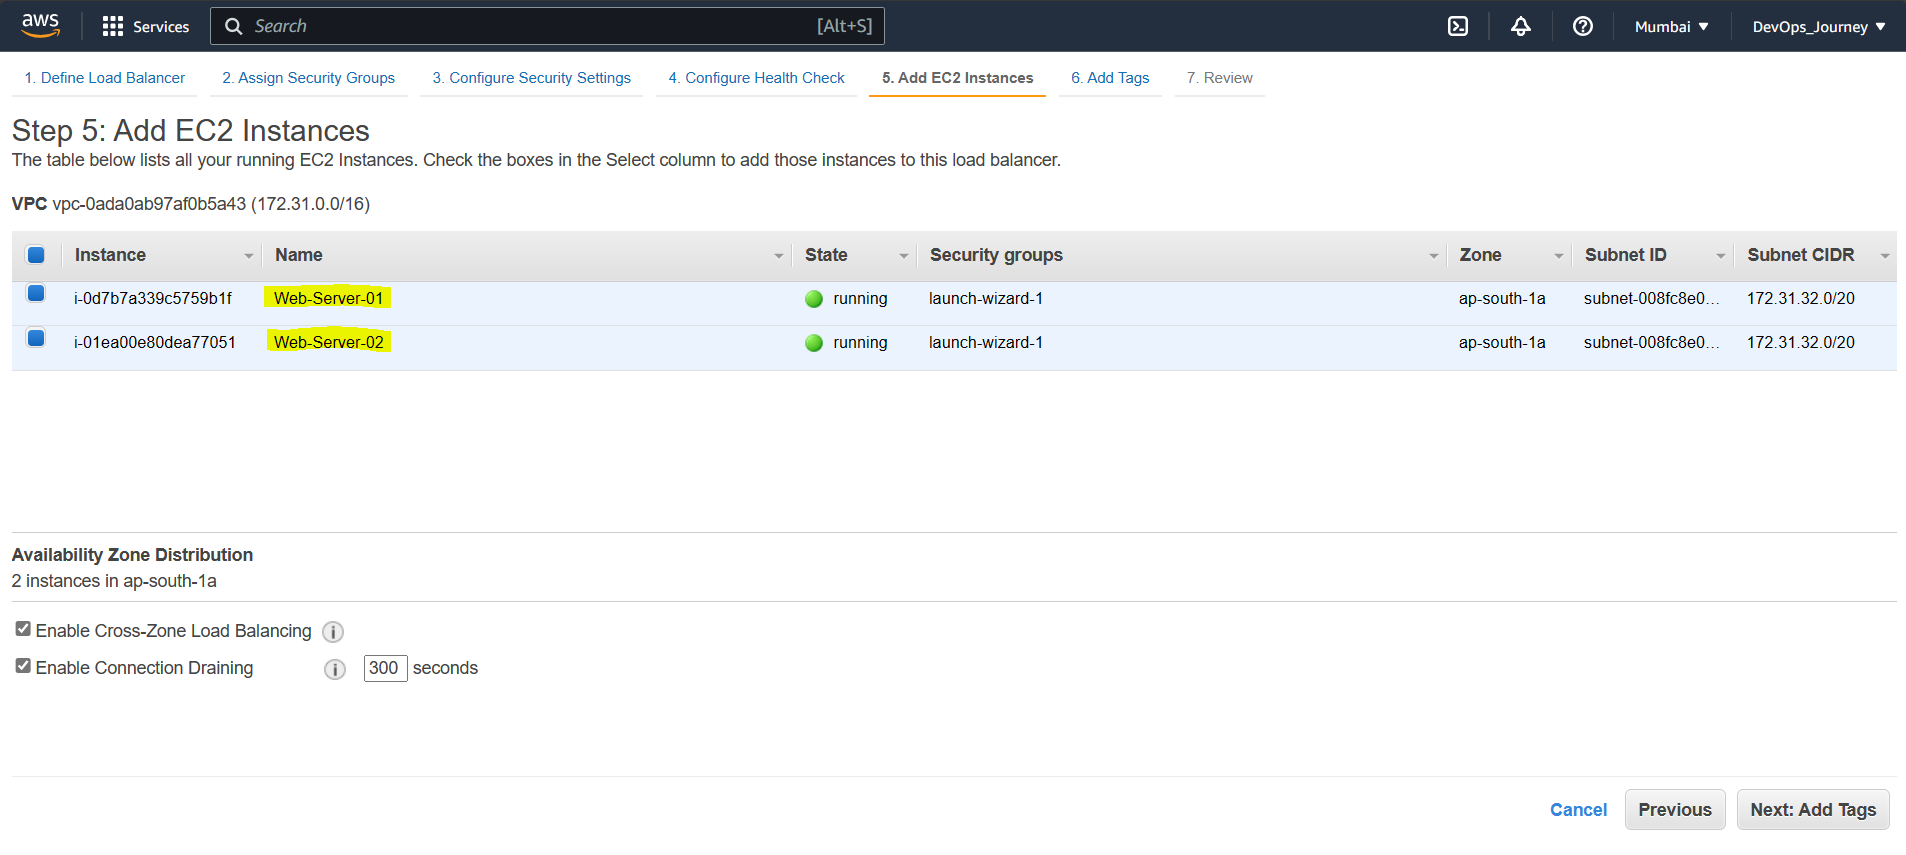
Select the web servers which we want to be attached to the load balancer.
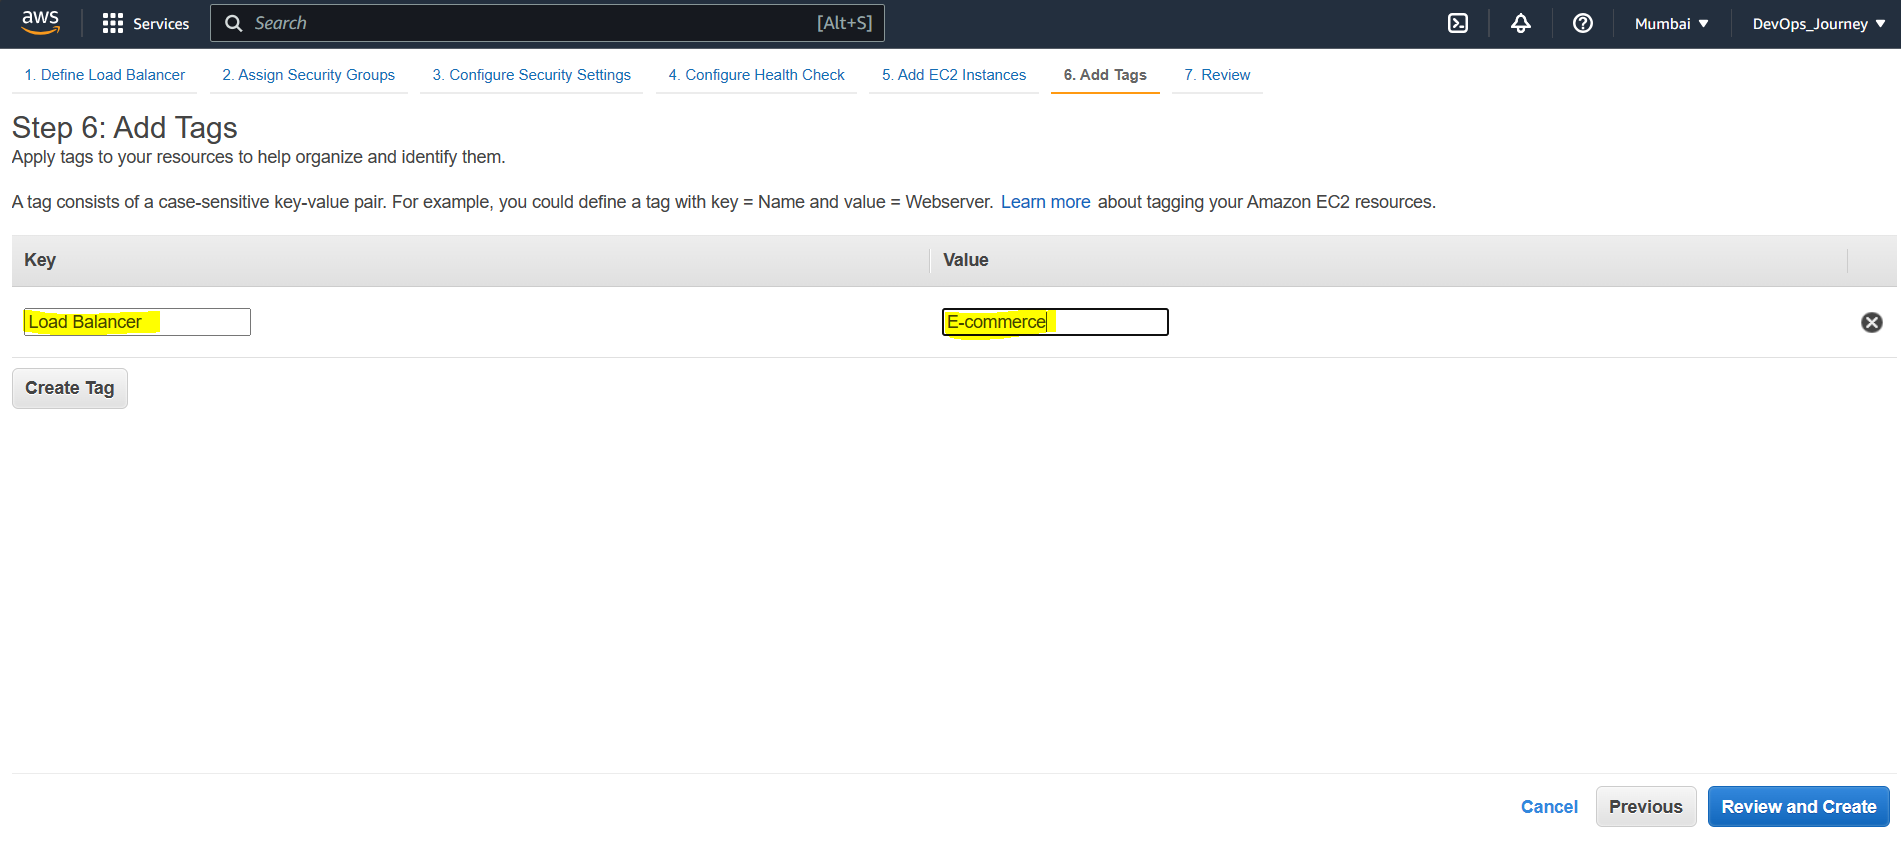
Adding tags is optional, but we can use it as it will help us to filter out the type of load balancer from all existing load balancers present in the account. and click on the review & create.

Review all the configurations and click on create.

Our load balancer E-commerce-LB-01 is successfully created and from now onwards it will distribute the incoming web traffic coming from the user's end to both the web servers.
Points to be noted:-
The load balancer does not have an IP address.
The load balancer has its DNS name, so we give DNS name to the customers.
Always be careful while using any cloud services, for learning purposes, we must choose the free-tier eligible option only otherwise a bill will come out that we have to pay.
Always destroy the resource which is not in use.
It is recommended to have a look at the documentation of services we are going to use.
Load balancer service is provided by each cloud provider like AWS, Azure, and GCP. The concept is the same in all cloud providers just the name and some properties will be a little bit different. AWS - Elastic Load Balancing (ELB)
Azure - Azure Load Balancing
GCP - Cloud Load Balancing
Thank you so much for taking your valuable time for reading.
I have tried my level best to explain as much information as possible in the easiest manner. Any feedback for further improvement will be highly appreciated! WeMakeDevs
We can connect at Rahul Kumar Verma | LinkedIn Rahul Kumar Verma (@RahulKu28171925) / Twitter


